
Getting Started Guide
Chapter
13
Getting
Started with Macros
Using the Macro Recorder … and beyond
Copyright
This document is Copyright © 2010–2011 by its contributors as listed below. You may distribute it and/or modify it under the terms of either the GNU General Public License (http://www.gnu.org/licenses/gpl.html), version 3 or later, or the Creative Commons Attribution License (http://creativecommons.org/licenses/by/3.0/), version 3.0 or later.
All trademarks within this guide belong to their legitimate owners.
Contributors
Ron
Faile Jr.
Martin Fox
Andrew Pitonyak
Feedback
Please direct any comments or suggestions about this document to: documentation@global.libreoffice.org
Acknowledgments
This chapter is based on Chapter 13 of Getting Started with OpenOffice.org 3.3. The contributors to that chapter are:
Andrew
Pitonyak
Jean Hollis Weber
Publication date and software version
Published 14 August 2011. Based on LibreOffice 3.3.3.
Some keystrokes and menu items are different on a Mac from those used in Windows and Linux. The table below gives some common substitutions for the instructions in this chapter. For a more detailed list, see the application Help.
|
Windows/Linux |
Mac equivalent |
Effect |
|
Tools → Options menu selection |
Libreoffice → Preferences |
Access setup options |
|
Right-click |
Control+click |
Opens a context menu |
|
Ctrl (Control) |
z (Command) |
Used with other keys |
|
F5 |
Shift+z+F5 |
Opens the Navigator |
|
F11 |
z+T |
Opens the Styles and Formatting window |
Contents
Viewing and editing the macro 7
Defining subroutines with SUB 8
Defining variables using DIM 8
Sometimes the macro recorder fails 13
How the macro recorder uses the dispatch framework 13
Downloading macros to import 18
A macro is a saved sequence of commands or keystrokes that are stored for later use. An example of a simple macro is one that “types” your address. The LibreOffice macro language is very flexible, allowing automation of both simple and complex tasks. Macros are especially useful to repeat a task the same way over and over again.
LibreOffice macros are usually written in a language called LibreOffice Basic, or just abbreviated Basic. Although you can learn Basic and write macros, there is a steep learning curve to writing macros from scratch. The usual methods for a beginner are to add macros that someone else has written and to use the built-in macro recorder, which records your keystrokes and saves them for use.
In LibreOffice recording of macros is currently classified as an “experimental (unstable)” feature. To enable macro recording, use Tools → Options → LibreOffice → General and select the Enable experimental (unstable) features option.
Most tasks in LibreOffice are accomplished by “dispatching a command” (sending a command), which is intercepted and used. The macro recorder works by recording the commands that are dispatched (see “The dispatch framework” on page 13).
The first step in learning macro programming is to find and use existing macros. This section assumes that you have a macro that you want to use; the macro may be in an email, on a web page, or even in a book. For this example, use the macro in Listing 1.
Listing 1: Simple macro that says hello.
Sub HelloMacro
Print "Hello"
End Sub
You must create a library and module to contain your macro; this is covered in “Macro organization” on page 14. Use these steps to create a library to contain your macro:
Use Tools → Macros → Organize Macros → LibreOffice Basic to open the Macro dialog (see Figure 2 and Figure 7).
Click Organizer to open the Basic Macro Organizer dialog (see Figure 8).
Select the Libraries tab.
Set the Location to My Macros & Dialogs, which is the default.
Click New to open the New Library dialog. Enter a library name such as “TestLibrary” and click OK.
Select the Modules tab.
In the Module list, expand My Macros and select TestLibrary. A module named Module1 already exists and can contain your macro. You can click New to create another module in TestLibrary.
Select the Module1, or the new module that you created, and click Edit to open the Integrated Debugging Environment (IDE).
The IDE is a text editor for macros that allows you to edit and create macros. Copy the macro into the IDE.
When a new module is created, it contains a comment and an empty macro named Main, that does nothing.
Listing 2: Contents of Module1 after it is created.
REM ***** BASIC *****
Sub Main
End Sub
Add the new macro either before Sub Main or after End Sub. In Listing 3, the new macro has been added before Sub Main.
Listing 3: Module1 after adding the new macro.
REM ***** BASIC *****
Sub HelloMacro
Print "Hello"
End Sub
Sub Main
End Sub
Click
the Run Basic button
![]() in the toolbar, or press F5,
to run the first macro in the module. Use the Macro dialog, opened
using the Select macro button
in the toolbar, or press F5,
to run the first macro in the module. Use the Macro dialog, opened
using the Select macro button
![]() or Tools
→
Macros →
Organize Macros →
LibreOffice
Basic, to select and run any macro in the module.
or Tools
→
Macros →
Organize Macros →
LibreOffice
Basic, to select and run any macro in the module.
Imagine repeatedly entering simple information. Although you can store the information in the clipboard, if you use the clipboard for something else, the contents are changed. Storing the contents as a macro is a simple solution. (In some simple cases, including the example used here, a better solution is to use AutoText.)
 Use
Tools
→
Macros →
Record Macro to start recording a macro.
Use
Tools
→
Macros →
Record Macro to start recording a macro.
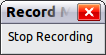
A small window is displayed so you know that LibreOffice is recording.
Type the desired information or perform an appropriate series of operations. In this case, I typed the name, Andrew Pitonyak.
Click the Stop Recording button to stop recording, save the macro, and display the LibreOffice Basic Macros dialog.
Be certain to open the library container named My Macros. Find the library named Standard under My Macros. Be warned, every library container has a library named Standard. Select the Standard library and click New Module to create a new module to contain the macro.
The default module name is Module1. Type a descriptive name and click OK to create the module. The LibreOffice Basic Macros dialog is displayed again, showing the new module.
Highlight the newly created module. In the upper left corner, type the macro name to use, such as “EnterMyname”, and then click Save to save the macro.
If you followed all of the steps, the Standard library now contains a module named Recorded, which contains the EnterMyName macro, as shown in Figure 4.
|
Note |
When LibreOffice creates a new module, it automatically adds the macro named Main. |
Use Tools → Macros → Run Macro to open the Macro Selector dialog. Select the newly created macro and click Run.
There are other methods to run a macro. For example, use Tools → Macros → Organize Macros → LibreOffice Basic to open the macro organizer, which contains a Run button as well. Another method is to use the macro organizer; the dialog usually opens faster, but the selection process may be slightly slower.
You can view and edit the macro that was just created. Use Tools → Macros → Organize Macros → LibreOffice Basic to open the LibreOffice Basic Macros dialog (see Figure 4). Select the new macro and click Edit to open the macro in the Basic IDE (Integrated Development Environment).
Listing 4: Generated “EnterMyname” macro.
REM ***** BASIC *****
Sub Main
End Sub
sub EnterMyName
rem -------------------------------------------------------------
rem define variables
dim document as object
dim dispatcher as object
rem -------------------------------------------------------------
rem get access to the document
document = ThisComponent.CurrentController.Frame
dispatcher = createUnoService("com.sun.star.frame.DispatchHelper")
rem -------------------------------------------------------------
dim args1(0) as new com.sun.star.beans.PropertyValue
args1(0).Name = "Text"
args1(0).Value = "Andrew Pitonyak"
dispatcher.executeDispatch(document, ".uno:InsertText", "", 0, args1())
end sub
The macro in Listing 4 is not as complicated as it first appears. Learning a few things helps significantly in understanding the generated macros. The discussion starts with features near the top of the macro listing and describes them. If you like to avoid details, then simply change the text “Andrew Pitonyak” in the macro above to what you want to insert at the current cursor position.
The keyword REM, short for remark, starts a macro comment. All text after REM (on the same line) is ignored. As a short cut, the single quote character can also be used to start a comment.
|
Tip |
LibreOffice Basic is not case-sensitive for keywords, so REM, Rem, and rem all start a comment. If you use symbolic constants defined by the API, it is safer to assume that the names are case-sensitive—symbolic constants are an advanced topic not usually needed by people that use the macro recorder. |
Individual macros are stored in subroutines defined with the keyword SUB. The end of a subroutine is indicated by the words END SUB. The code starts by defining the subroutine named Main, which is empty and does nothing. The next subroutine, EnterMyName, contains the generated code.
|
Tip |
LibreOffice always creates an empty subroutine named Main when it creates a module. |
There are advanced topics that are beyond the scope of this document, but knowing about them might be of interest:
You can write a macro so that values can be passed to the subroutine. The values are called arguments. Recorded macros do not accept arguments.
Another kind of subroutine is called a function. A function is a subroutine that returns a value. The keyword FUNCTION is used rather than SUB to define a function. Generated macros are always of type SUB.
You can write information on a piece of paper so that you can look at it later. A variable, like a piece of paper, contains information that can be changed and read. The DIM statement is similar to setting aside a piece of paper to be used to store a message or note.
The EnterMyName macro defines the variables document and dispatcher as type object. Other common variable types include string, integer, and date. A third variable, named args1, is an array of property values. A variable of type array allows a single variable to contain multiple values, similar to storing multiple pages in a single book. Values in an array are usually numbered starting from zero. The number in the parentheses indicates the highest usable number to access a storage location. In this example, there is only one value, and it is numbered zero.
The following details are very complete; it is not important to understand all of the details. The first line defines the start of the macro.
sub EnterMyName
Declare two variables:
dim document as object
dim dispatcher as object
ThisComponent refers to the current document.
The CurrentController property of a document refers to a service that “controls” the document. For example, when you type, it is the current controller that notices. The current controller then dispatches the changes to the document’s frame.
The Frame property of a controller returns a main frame for a document. Therefore, the variable named document refers to a document’s frame, which receives dispatched commands.
document = ThisComponent.CurrentController.Frame
Most tasks in LibreOffice are accomplished by dispatching a command. LibreOffice includes a dispatch helper service, which does most of the work to use dispatches in macros. The method CreateUnoService accepts the name of a service and it tries to create an instance of that service. On completion, the dispatcher variable contains a reference to a DispatchHelper.
dispatcher = createUnoService("com.sun.star.frame.DispatchHelper")
Declare an array of properties. Each property has a name and a value. In other words, it is a name/value pair. The created array has one property at index zero.
dim args1(0) as new com.sun.star.beans.PropertyValue
Give the property the name “Text” and the value “Andrew Pitonyak”, which is the text that is inserted when the macro is run.
args1(0).Name = "Text"
args1(0).Value = "Andrew Pitonyak"
This is where the magic happens. The dispatch helper sends a dispatch to the document’s frame (stored in the variable named document) with the command .uno:InsertText. The next two arguments, frame name and search flags, are beyond the scope of this document. The last argument is the array of property values to be used while executing the command InsertText.
dispatcher.executeDispatch(document, ".uno:InsertText", "", 0, args1())
Finally, the end of the subroutine.
end sub
When creating a macro, it is important to ask two questions before recording:
Can the task be written as a simple set of commands?
Can the steps be arranged such that the last command leaves the cursor ready for the next command?
I frequently copy rows and columns of data from a web site and format them as a table in a text document. First, I copy the table from the web site to the clipboard. To avoid strange formatting and fonts, I paste the text into a Writer document as unformatted text. I reformat the text with tabs between columns so that I can use Table → Convert → Text to Table to convert to a table.
I inspect the text to see if I can record a macro to format the text (remember the two questions that I ask). As an example, I copied the FontWeight constants group from the API web site. The first column indicates the constant name. Each name is followed by a space and a tab.
I want the first column to contain the numeric value, the second column the name, and the third column the description. The desired work is easily accomplished for every row except for DONTKNOW and NORMAL, which do not contain a numeric value—but I know that the values are 0 and 100, so I will enter those manually.
The data can be cleaned in multiple ways—all of them easy. The first example uses keystrokes that assume the cursor is at the start of the line with the text THIN.
Use Tools → Macros → Record Macro to start recording.
Press Ctrl+Right Arrow to move the cursor to the start of “specifies”.
Press Backspace twice to remove the tab and the space.
Press Tab to add the tab without the space after the constant name.
Press Delete to delete the lower case s and then press S to add an upper case S.
Press Ctrl+Right Arrow twice to move the cursor to the start of the number.
Press Ctrl+Shift+Right Arrow to select and move the cursor before the % sign.
Press Ctrl+C to copy the selected text to the clipboard.
Press End to move the cursor to the end of the line.
Press Backspace twice to remove the two trailing spaces.
Press Home to move the cursor to the start of the line.
Press Ctrl+V to paste the selected number to the start of the line.
Pasting the value also pasted an extra space, so press Backspace to remove the extra space.
Press Tab to insert a tab between the number and the name.
Press Home to move to the start of the line.
Press down arrow to move to the next line.
Stop recording the macro and save the macro.
It takes much longer to read and write the steps than to record the macro. Work slowly and think about the steps as you do them. With practice this becomes second nature.
The generated macro has been modified to contain the step number in the comments to match the code to the step above.
Listing 5: Copy the numeric value to the start of the column.
sub CopyNumToCol1
rem -------------------------------------------------------------
rem define variables
dim document as object
dim dispatcher as object
rem -------------------------------------------------------------
rem get access to the document
document = ThisComponent.CurrentController.Frame
dispatcher = createUnoService("com.sun.star.frame.DispatchHelper")
rem (2) Press Ctrl+Right Arrow to move the cursor to the start of “specifies”.
dispatcher.executeDispatch(document, ".uno:GoToNextWord", "", 0, Array())
rem (3) Press Backspace twice to remove the tab and the space.
dispatcher.executeDispatch(document, ".uno:SwBackspace", "", 0, Array())
rem -------------------------------------------------------------
dispatcher.executeDispatch(document, ".uno:SwBackspace", "", 0, Array())
rem (4) Press Tab to add the tab without the space after the constant name.
dim args4(0) as new com.sun.star.beans.PropertyValue
args4(0).Name = "Text"
args4(0).Value = CHR$(9)
dispatcher.executeDispatch(document, ".uno:InsertText", "", 0, args4())
rem (5) Press Delete to delete the lower case s ....
dispatcher.executeDispatch(document, ".uno:Delete", "", 0, Array())
rem (5) ... and then press S to add an upper case S.
dim args6(0) as new com.sun.star.beans.PropertyValue
args6(0).Name = "Text"
args6(0).Value = "S"
dispatcher.executeDispatch(document, ".uno:InsertText", "", 0, args6())
rem (6) Press Ctrl+Right Arrow twice to move the cursor to the number.
dispatcher.executeDispatch(document, ".uno:GoToNextWord", "", 0, Array())
rem -------------------------------------------------------------
dispatcher.executeDispatch(document, ".uno:GoToNextWord", "", 0, Array())
rem (7) Press Ctrl+Shift+Right Arrow to select the number.
dispatcher.executeDispatch(document, ".uno:WordRightSel", "", 0, Array())
rem (8) Press Ctrl+C to copy the selected text to the clipboard.
dispatcher.executeDispatch(document, ".uno:Copy", "", 0, Array())
rem (9) Press End to move the cursor to the end of the line.
dispatcher.executeDispatch(document, ".uno:GoToEndOfLine", "", 0, Array())
rem (10) Press Backspace twice to remove the two trailing spaces.
dispatcher.executeDispatch(document, ".uno:SwBackspace", "", 0, Array())
rem -------------------------------------------------------------
dispatcher.executeDispatch(document, ".uno:SwBackspace", "", 0, Array())
rem (11) Press Home to move the cursor to the start of the line.
dispatcher.executeDispatch(document, ".uno:GoToStartOfLine", "", 0, Array())
rem (12) Press Ctrl+V to paste the selected number to the start of the line.
dispatcher.executeDispatch(document, ".uno:Paste", "", 0, Array())
rem (13) Press Backspace to remove the extra space.
dispatcher.executeDispatch(document, ".uno:SwBackspace", "", 0, Array())
rem (14) Press Tab to insert a tab between the number and the name.
dim args17(0) as new com.sun.star.beans.PropertyValue
args17(0).Name = "Text"
args17(0).Value = CHR$(9)
dispatcher.executeDispatch(document, ".uno:InsertText", "", 0, args17())
rem (15) Press Home to move to the start of the line.
dispatcher.executeDispatch(document, ".uno:GoToStartOfLine", "", 0, Array())
rem (16) Press Down Arrow to move to the next line.
dim args19(1) as new com.sun.star.beans.PropertyValue
args19(0).Name = "Count"
args19(0).Value = 1
args19(1).Name = "Select"
args19(1).Value = false
dispatcher.executeDispatch(document, ".uno:GoDown", "", 0, args19())
end sub
Cursor movements are used for all operations (as opposed to searching). If run on the DONTKNOW line, the word weight is moved to the front of the line, and the first “The” is changed to “She”. This is not perfect, but I should not have run the macro on the lines that did not have the proper format; I need to do these manually.
It is tedious to repeatedly run the macro using Tools → Macros → Run Macro (see Figure 4). The macro can be run from the IDE. Use Tools → Macros → Organize Macros → LibreOffice Basic to open the Basic Macro dialog. Select your macro and click Edit to open the macro in the IDE.
The IDE has a Run Basic icon in the toolbar that runs the first macro in the IDE. Unless you change the first macro, it is the empty macro named Main. Modify Main so that it reads as shown in Listing 6.
Listing 6: Modify Main to call CopyNumToCol1.
Sub Main
CopyNumToCol1
End Sub
Now, you can run CopyNumToCol1 by repeatedly clicking the Run Basic icon in the toolbar of the IDE. This is very fast and easy, especially for temporary macros that will be used a few times and then discarded.
Sometimes the macro recorder fails
Understanding the LibreOffice internals helps to understand how and why the macro recorder frequently fails. The primary offender is related to the dispatch framework and its relationship to the macro recorder.
The purpose of the dispatch framework is to provide uniform access to components (documents) for commands that usually correspond to menu items. I can use File → Save from the menu, the shortcut keys Ctrl+S, or click on the Save toolbar icon. All of these commands are translated into the same “dispatch command”.
The dispatch framework can also be used to send “commands” back to the UI (User Interface). For example, after saving the document, the File Save command is disabled. As soon as the document has been changed, the File Save command is enabled.
If we see a dispatch command, it is text such as .uno:InsertObject or .uno:GoToStartOfLine. The command is sent to the document’s frame, and the frame passes on the command until an object is found that can handle the command.
How the macro recorder uses the dispatch framework
The macro recorder records the generated dispatches. The recorder is relatively simple to implement and the same commands that are issued are recorded for later use. The problem is that not all dispatched commands are complete. For example, inserting an object generates the following code:
dispatcher.executeDispatch(document, ".uno:InsertObject", "", 0, Array())
It is not possible to specify what kind of object to create or insert. If an object is inserted from a file, you cannot specify which file to insert.
I recorded a macro and used Tools → Options to open and modify configuration items. The generated macro does not record any configuration changes; in fact, the generated code is commented so it will not even be run.
rem dispatcher.executeDispatch(document,
".uno:OptionsTreeDialog", "", 0, Array())
If a dialog is opened, the command to open the dialog is likely to be generated. Any work done inside the dialog is not usually recorded. Examples include macro organization dialogs, inserting special characters, and similar types of dialogs. Other possible problems using the macro recorder include things such as inserting a formula, setting user data, setting filters in Calc, actions in database forms, and exporting a document to an encrypted PDF file. You never know for certain what will work unless you try it, however. The actions from the search dialog are properly captured, for example.
When the macro recorder is not able to solve a specific problem, the usual solution is to write code using the LibreOffice objects. Unfortunately, there is a steep learning curve for the objects. It is usually best to start with simple examples and then branch out slowly as you learn more. Learning to read generated macros is a good place to start.
If you record Calc macros, and the recorder can correctly generate a macro, there is an add-in created by Paolo Mantovani, which converts Calc macros when they are recorded. The final code manipulates LibreOffice objects rather than generating dispatches. This can be very useful for learning the object model.
You can download the macro recorder from Paolo’s web site directly:
http://www.paolo-mantovani.org/downloads/DispatchToApiRecorder/
In LibreOffice, macros are grouped in modules, modules are grouped in libraries, and libraries are grouped in library containers. A library is usually used as a major grouping for either an entire category of macros, or for an entire application. Modules usually split functionality, such as user interaction and calculations. Individual macros are subroutines and functions.
A computer scientist would use Figure 6 to precisely describe the situation. The text “1..*” means one or more, and “0..*” means zero or more. The black triangle means composed of or contains.
A library container contains one or more libraries, and each library is contained in one library container.
A library contains zero or more modules, and each module is contained in one library.
A module contains zero or more macros, and each macro is contained in one module.

Use Tools → Macros → Organize Macros → LibreOffice Basic to open the LibreOffice Basic Macros dialog (see Figure 7). All available library containers are shown in the Macro from list. Every document is a library container, capable of containing multiple libraries. The application itself acts as two library containers, one container for macros distributed with LibreOffice called LibreOffice Macros, and one container for personal macros called My Macros. As shown in Figure 7, only two documents are currently open.
The LibreOffice Macros are stored with the application runtime code, which may not be editable to you unless you are an administrator. This is just as well since these macros should not be changed and you should not store your own macros in the LibreOffice container.
Unless your macros are applicable to a single document, and only to a single document, your macros will probably be stored in the My Macros container. The My Macros container is stored in your user area or home directory.
If a macro is contained in a document, then a recorded macro will attempt to work on that document; primarily because it uses “ThisComponent” for its actions.
Every library container contains a library named Standard. It is better to create your own libraries with meaningful names than to use the Standard library. Not only are meaningful names easier to manage, but they can also be imported into other library containers whereas the Standard library cannot.
|
Caution
|
LibreOffice allows you to import libraries into a library container, but it will not allow you to overwrite the library named Standard. Therefore, if you store your macros in the Standard library, you cannot import them into another library container. |
Just as it makes good sense to give your libraries meaningful names, it is prudent to use meaningful names for your modules. By default, LibreOffice uses names such as Module1. Feel free to use your own meaningful name.
As you create your macros, you must decide where to store them. Storing a macro in a document is useful if the document will be shared and you want the macro to be included with the document. Macros stored in the application library container named My Macros, however, are globally available to all documents.
Macros are not available until the library that contains them is loaded. The Standard library and Template library, however, are automatically loaded. A loaded library is displayed differently from a library that is not loaded. To load the library and the modules it contains, double-click on the library.
LibreOffice stores user-specific data in a directory under the user’s home directory. The location is operating system specific. Use Tools → Options → LibreOffice → Paths to view where other configuration data is stored. On Windows XP, this is C:\Documents and Settings\<name>\ Application Data. User macros are stored in LibreOffice\3\user\basic. Each library is stored in its own directory off the basic directory.
It is not important to understand where macros are stored for casual use. If you know where they are stored, however, you can create a backup, share your macros, or inspect them if there is an error.
Use Tools → Macros → Organize Dialogs to open the LibreOffice Macro Organizer dialog. Another common way to open this dialog is to use Tools → Macros → Organize Macros → LibreOffice Basic to open the LibreOffice Macros dialog and then click the Organizer button.
The LibreOffice Macro Organizer dialog provides functionality to create, delete, and rename libraries, modules, and dialogs. Select the library container to use and then click the Import button to import macro libraries (see Figure 9).
|
Note |
You cannot import the library named Standard. |
|
Tip |
On Linux, the LibreOffice-specific files are stored under the user's home directory in a directory whose name begins with a period. Directories and files with names beginning with a period are not shown in a normal selection dialog. To open the directory, either navigate to the home directory, enter the name .libreoffice\3, and then click Open or press Ctrl-H to show hidden folders and files and navigate as usual. This will open the directory, which is not initially shown. |
Navigate to the directory containing the library to import. There are usually two files from which to choose, dialog.xlb and script.xlb. It does not matter which of these two files you select; both will be imported. Select a file and click Open to continue.
If the library already exists, it will not be replaced unless Replace existing libraries is checked. If Insert as reference is checked, the library is referenced in its current location, but you cannot edit the library. If Insert as reference is not checked, however, the library is copied to the user’s macro directory.
Macros can be stored in libraries inside LibreOffice documents. Select a document rather than a directory on disk (as shown in Figure 9) to import libraries contained in a document.
Macros are available for download. Some macros are contained in documents, some as regular files that you must select and import, and some as macro text that should be copied and pasted into the Basic IDE; use Tools → Macros → Organize Macros → LibreOffice Basic to open the LibreOffice Macros dialog, choose the macro to edit, and then click Edit to open the macro in the Basic IDE.
Some macros are available as free downloads on the Internet (see Table 1). “Adding an existing macro“ on page 4 describes how to add these macros to your macros library.
Table 1. Places to find macro examples
|
Location |
Description |
|
Collection of packaged macros – now somewhat dated. |
|
|
Reference materials regarding macros. |
|
|
Reference materials regarding database macros. |
|
|
Lots of links to everything. |
|
|
A forum, with many examples and help. |
|
|
Another forum, with many examples and help. |
A typical method to run a macro is as follows:
Use Tools → Macros → Run Macro to open the Macro Selector dialog (see Figure 11).
Select the library and module in the Library list (left hand side).
Select the macro in the Macro name list (right hand side).
Click Run to run the macro.
Although you can use Tools → Macros → Run Macro to run all macros, this is not efficient for frequently run macros. A more common technique is to assign a macro to a toolbar button, menu item, keyboard shortcut, or a button embedded in a document. While choosing a method, it is also good to ask questions such as:
Should the macro be available for only one document, or globally for all documents?
Does the macro pertain to a specific document type, such as a Calc document?
How frequently will the macro be used?
The answers will determine where to store the macro and how to make it available. For example, you will probably not add a rarely used macro to a toolbar. To help determine your choices, see Table 2.
Table 2. Methods for starting a macro
|
Type |
LibreOffice |
Document Type |
Document |
|
Toolbar |
No |
Yes |
Yes |
|
Menu |
No |
Yes |
Yes |
|
Shortcut |
Yes |
Yes |
No |
|
Event |
Yes |
No |
Yes |
To add a menu item, keyboard shortcut, or toolbar icon that calls a macro, use the Customize dialog (see Figure 13). Open this dialog in either of these ways:
Choose Tools → Customize from the main menu bar.
Each toolbar has an icon
![]() that opens a menu; choose the Customize
Toolbar option.
that opens a menu; choose the Customize
Toolbar option.
|
Tip |
Complete coverage of the Customize dialog is beyond the scope of this document. Click the Help button to access the help pages included with LibreOffice. |
The Customize dialog contains tabs to configure menus, keyboard bindings, toolbars, and events.
Macros can be added to toolbars. For more about modifying toolbars, see Chapter 14, Customizing LibreOffice.
Use Tools → Customize to open the Customize dialog, and select the Menus tab. You can modify an existing menu, or create new menus that call macros. For more about modifying menus, see Chapter 14.
Use Tools → Customize to open the Customize dialog, and select the Keyboard tab. Assigning keyboard shortcuts is discussed in Chapter 14.

In LibreOffice, when something happens, we say that an event occurred. For example, a document was opened, a key was pressed, or the mouse moved. LibreOffice allows events to cause a macro to be called; the macro is then called an event handler. Full coverage of event handlers is well beyond the scope of this document, but a little knowledge can accomplish much.
|
Caution
|
Be careful when you configure an event handler. For example, assume that you write an event handler that is called every time that a key is pressed, but you make a mistake so the event is not properly handled. One possible result is that your event handler will consume all key presses, forcing you to forcibly terminate LibreOffice. |
Use Tools → Customize to open the Customize dialog, and select the Events tab (see Figure 13). The events in the Customize dialog are related to the entire application and specific documents. Use the Save In box to choose LibreOffice, or a specific document.
A common use is to assign the Open Document event to call a specific macro. The macro then performs certain setup tasks for the document. Select the desired event and click the Macro button to open the Macro Selector dialog (see Figure 14).
Select the desired macro and click OK to assign the macro to the event. The Events tab shows that the event has been assigned to a macro (see Figure 15). When the document opens, the PrintHello macro is run.
Many objects in a document can be set to call macros when events occur. The most common usage is to add a control, such as a button, into a document. Even double-clicking on a graphic opens a dialog with a Macros tab that allows you to assign a macro to an event.
An extension is a package that can be installed into LibreOffice to add new functionality. Extensions can be written in almost any programming language and may be simple or sophisticated. Extensions can be grouped into types:
Calc Add-Ins, which provide new functionality for Calc, including new functions that act like normal built-in functions
New components and functionality, which normally include some level of UI integration such as new menus or toolbars
Data pilots that are used directly in Calc
Chart Add-Ins with new chart types
Linguistic components such as spell checkers
Document templates and images
Although individual extensions can be found in different places, there is currently an extension repository at: http://extensions2.libreoffice.org/ and some documentation at http://libreplanet.org/wiki/Group:OpenOfficeExtensions/List
For more about obtaining and installing extensions, see Chapter 14, Customizing LibreOffice.
Writing macros without the recorder
The examples covered in this chapter are created using the macro recorder and the dispatcher. You can also write macros that directly access the objects that comprise LibreOffice. In other words, you can directly manipulate a document.
Directly manipulating LibreOffice's internal objects is an advanced topic that is beyond the scope of this chapter. A simple example, however, demonstrates how this works.
Listing 7: Append the text “Hello” to the current document.
Sub AppendHello
Dim oDoc
Dim sTextService$
Dim oCurs
REM ThisComponent refers to the currently active document.
oDoc = ThisComponent
REM Verify that this is a text document
sTextService = "com.sun.star.text.TextDocument"
If NOT oDoc.supportsService(sTextService) Then
MsgBox "This macro only works with a text document"
Exit Sub
End If
REM Get the view cursor from the current controller.
oCurs = oDoc.currentController.getViewCursor()
REM Move the cursor to the end of the document
oCurs.gotoEnd(False)
REM Insert text "Hello" at the end of the document
oCurs.Text.insertString(oCurs, "Hello", False)
End Sub
Numerous resources are available that provide help with writing macros. Use Help → LibreOffice Help to open the LibreOffice help pages. The upper left corner of the LibreOffice help system contains a drop-down list that determines which help set is displayed. To view the help for Basic, choose LibreOffice Basic from this list.
Many excellent macros are included with LibreOffice. Use Tools → Macros → Organize Macros → LibreOffice Basic to open the Macro dialog. Expand the Tools library in the LibreOffice library container. Inspect the Debug module—some good examples include WritedbgInfo(document) and printdbgInfo(sheet).
The following links and references contain information regarding macro programming:
http://user.services.openoffice.org/ (OOo forums, well supported; volunteers answer questions about LibreOffice as well)
http://api.openoffice.org/docs/common/ref/com/sun/star/module-ix.html (official IDL reference; here you'll find almost every command with a description)
http://wiki.services.openoffice.org/wiki/Documentation/BASIC_Guide (official OpenOffice.org BASIC Programming Guide). Also available in .ODT format from http://wiki.documentfoundation.org/Documentation#Other_Documentation_and_Resources
http://wiki.services.openoffice.org/wiki/Documentation/DevGuide (official OpenOffice.org Developers Guide; contains a detailed explanation). Also available in .ODT format from http://wiki.documentfoundation.org/Documentation#Other_Documentation_and_Resources
http://www.pitonyak.org/oo.php (Andrew Pitonyak’s macro page)
http://www.pitonyak.org/AndrewMacro.odt (numerous examples of working macros)
http://www.pitonyak.org/OOME_3_0.odt (Andrew Pitonyak’s book on macros)
http://www.pitonyak.org/database/ (numerous macro examples using Base)
http://docs.sun.com/app/docs/doc/819-0439 (Sun’s book on macro programming—very well written and laid out; the OOo BASIC Programming Guide and the OOo Developers Guide are derived from this book)
There are currently no books specific to LibreOffice macros which are available for download.
For OpenOffice.org the following books are available for purchase in both printed and eBook form from their publishers.
Dr.
Mark Alexander Bain’s Learn
OpenOffice.org Spreadsheet Macro Programming.
See
http://www.packtpub.com/openoffice-ooobasic-calc-automation/book.
Roberto
Benitez's Database
Programming with OpenOffice.org Base & Basic.
See
http://www.lulu.com/product/paperback/database-programming-with-openofficeorg-base-basic/3568728