
Getting Started Guide
Chapter
14
Customizing LibreOffice
This document is Copyright © 2010 by its contributors as listed below. You may distribute it and/or modify it under the terms of either the GNU General Public License (http://www.gnu.org/licenses/gpl.html), version 3 or later, or the Creative Commons Attribution License (http://creativecommons.org/licenses/by/3.0/), version 3.0 or later.
All trademarks within this guide belong to their legitimate owners.
Contributors
Ron Faile Jr.
Feedback
Please direct any comments or suggestions about this document to: documentation@libreoffice.org
Acknowledgments
This chapter is based on Chapter 14 of Getting Started with OpenOffice.org. The contributors to that chapter are:
Peter
Hillier-Brook
Jean Hollis Weber
Michele Zarri
Publication date and software version
Published 30 December 2010. Based on LibreOffice 3.3.
Some keystrokes and menu items are different on a Mac from those used in Windows and Linux. The table below gives some common substitutions for the instructions in this chapter. For a more detailed list, see the application Help.
|
Windows/Linux |
Mac equivalent |
Effect |
|
Tools → Options menu selection |
LibreOffice → Preferences |
Access setup options |
|
Right-click |
Control+click |
Opens a context menu |
|
Ctrl (Control) |
z (Command) |
Used with other keys |
|
F5 |
Shift+z+F5 |
Opens the Navigator |
|
F11 |
z+T |
Opens the Styles & Formatting window |
Contents
Adding a command to a toolbar 8
Choosing icons for toolbar commands 9
Example: Adding a Fax icon to a toolbar 9
Example: Assigning styles to shortcut keys 11
Loading a saved keyboard configuration 13
Resetting the shortcut keys 13
This chapter describes some common customizations that you may wish to do.
You can customize menus, toolbars, and keyboard shortcuts in LibreOffice, add new menus and toolbars, and assign macros to events. However, you cannot customize context (right-click) menus.
Other customizations are made easy by extensions that you can install from the LibreOffice website or from other providers.
|
Note |
Customizations to menus and toolbars can be saved in a template. To do so, first save them in a document and then save the document as a template as described in Chapter 3, Styles and Templates. |
In addition to changing the menu font (described in Chapter 2), you can add and rearrange items on the menu bar, add items to menus, and make other changes.
To customize menus:
Choose Tools → Customize.
On the Customize dialog, pick the Menus page.
In the Save In drop-down list, choose whether to save this changed menu for the application (for example, LibreOffice Writer) or for a selected document (for example, SampleDocument.odt).
In the section LibreOffice [name of the program (example: Writer)] Menus, select from the Menu drop-down list the menu that you want to customize. The list includes all the main menus as well as submenus (menus that are contained under another menu). For example, in addition to File, Edit, View, and so on, there is File | Send and File |Templates. The commands available for the selected menu are shown in the central part of the dialog.
To customize the selected menu, click on the Menu or Modify buttons. You can also add commands to a menu by clicking on the Add button. These actions are described in the following sections. Use the up and down arrows next to the Entries list to move the selected menu item to a different position.
When you have finished making all your changes, click OK (not shown in illustration) to save them.
In the Customize dialog, click New to display the dialog shown in Figure 2.
Type a name for your new menu in the Menu name box.
Use the up and down arrow buttons to move the new menu into the required position on the menu bar.
Click OK to save.
The new menu now appears on the list of menus in the Customize dialog. (It will appear on the menu bar itself after you save your customizations.)
After creating a new menu, you need to add some commands to it, as described in “Adding a command to a menu” on page 6.
To modify an existing menu, select it in the Menu list and click the Menu button to drop down a list of modifications: Move, Rename, Delete. Not all of these modifications can be applied to all the entries in the Menu list. For example, Rename and Delete are not available for the menus supplied by LibreOffice.
To move a menu (such as File), choose Menu → Move. A dialog similar to the one shown in Figure 2 (but without the Menu name box) opens. Use the up and down arrow buttons to move the menu into the required position.
To move submenus (such as File | Send), select the main menu (File) in the Menu list and then, in the Menu Content section of the dialog, select the submenu (Send) in the Entries list and use the arrow keys to move it up or down in the sequence.
In addition to renaming, you can specify a keyboard shortcut that allows you to select a menu command when you press Alt+ an underlined letter in a menu command.
Select a menu entry.
Click the Modify button and select Rename.
Add a tilde (~) in front of the letter that you want to use as an accelerator. For example, to select the Save All command by pressing Alt+V (after opening the File menu using Alt+F), enter Sa~ve All.
|
Caution
|
Be careful when using these shortcuts. In the example above, if the File menu is not already open, then pressing Alt+V opens the View menu; if another other menu is open, Alt+V may activate another command. |
You can add commands to the supplied menus and to menus you have created. On the Customize dialog, select the menu in the Menu list and click the Add button in the Menu Content section of the dialog.
On the Add Commands dialog (Figure 3), select a category and then the command, and click Add. The dialog remains open, so you can select several commands. When you have finished adding commands, click Close. Back on the Customize dialog, you can use the up and down arrow buttons to arrange the commands in your preferred sequence.
In addition to changing the sequence of entries on a menu or submenu, you can add submenus, rename or delete the entries, and add group separators.
To begin, select the menu or submenu in the Menu list near the top of the Customize page, then select the entry in the Entries list under Menu Content. Click the Modify button and choose the required action from the drop-down list of actions.
Most of the actions should be self-explanatory. Begin a group adds a separator line after the highlighted entry.
You can customize toolbars in several ways, including choosing which icons are visible and locking the position of a docked toolbar, as described in Chapter 1, Introducing LibreOffice. This section describes how to create new toolbars and add other icons (commands) to the list of those available on a toolbar.
To get to the toolbar customization dialog, do any of the following:
On the toolbar, click the arrow at the end of the toolbar and choose Customize Toolbar.
Choose View → Toolbars → Customize from the menu bar.
Choose Tools → Customize from the menu bar and pick the Toolbars page (Figure 4).
To customize toolbars:
In the Save In drop-down list, choose whether to save this changed toolbar for the application (for example, Writer) or for a selected document.
In the section LibreOffice <name of the program (example: Writer) → Toolbars, select from the Toolbar drop-down list the toolbar that you want to customize.
You can create a new toolbar by clicking on the New button, or customize existing toolbars by clicking on the Toolbar or Modify buttons, and add commands to a toolbar by clicking on the Add button. These actions are described below.
When you have finished making all your changes, click OK to save them.
To create a new toolbar:
Choose Tools → Customize → Toolbars from the menu bar.
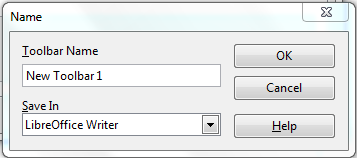
Click New. On the Name dialog, type the new toolbar's name and choose from the Save In drop-down list where to save this changed menu: for the application (for example, Writer) or for a selected document. Click OK.
The new toolbar now appears on the list of toolbars in the Customize dialog. After creating a new toolbar, you need to add some commands to it, as described below.
If the list of available buttons for a toolbar does not include all the commands you want on that toolbar, you can add commands. When you create a new toolbar, you need to add commands to it.
On the Toolbars page of the Customize dialog, select the toolbar in the Toolbar list and click the Add button in the Toolbar Content section of the dialog.
The Add Commands dialog is the same as for adding commands to menus (Figure 3). Select a category and then the command, and click Add. The dialog remains open, so you can select several commands. When you have finished adding commands, click Close. If you insert an item which does not have an associated icon, the toolbar will display the full name of the item: the next section describes how to choose an icon for a toolbar command.
Back on the Customize dialog, you can use the up and down arrow buttons to arrange the commands in your preferred sequence.
When you are done making changes, click OK to save.
Choosing icons for toolbar commands
Toolbar buttons usually have icons, not words, on them, but not all of the commands have associated icons.
To choose an icon for a command, select the command and click Modify → Change icon. On the Change Icon dialog, you can scroll through the available icons, select one, and click OK to assign it to the command.
To use a custom icon, create it in a graphics program and import it into LibreOffice by clicking the Import button on the Change Icon dialog. Custom icons should be 16 x 16 pixels in size to achive the best quality and should not contain more than 256 colors.
Example: Adding a Fax icon to a toolbar
You can customize LibreOffice so that a single click on an icon automatically sends the current document as a fax.
Be sure the fax driver is installed. Consult the documentation for your fax modem for more information.
Choose Tools → Options → LibreOffice Writer → Print. The dialog shown in Figure 6 opens.
Select the fax driver from the Fax list and click OK.
Click the arrow icon at the end of the Standard toolbar. In the drop-down menu, choose Customize Toolbar. The Toolbars page of the Customize dialog appears (Figure 4). Click Add.
On the Add Commands dialog (Figure 7), select Documents in the Category list, then select Send Default Fax in the Commands list. Click Add. Now you can see the new icon in the Commands list.
In the Commands list, click the up or down arrow button to position the new icon where you want it. Click OK and then click Close.
Your toolbar now has a new icon to send the current document as a fax.
In addition to using the built-in keyboard shortcuts (listed in Appendix A), you can define your own. You can assign shortcuts to standard LibreOffice functions or your own macros and save them for use with the entire LibreOffice suite.
|
Caution
|
Be careful when reassigning your operating system’s or LibreOffice’s predefined shortcut keys. Many key assignments are universally understood shortcuts, such as F1 for Help, and are always expected to provide certain results. Although you can easily reset the shortcut key assignments to the LibreOffice defaults, changing some common shortcut keys can cause confusion, especially if other users share your computer. |
To adapt shortcut keys to your needs, use the Customize dialog, as described below.
Select Tools → Customize → Keyboard. The Customize dialog opens.
To have the shortcut key assignment available in all components of LibreOffice select the LibreOffice radio button.
Next select the required function from the Category and Function lists.
Now select the desired shortcut keys in the Shortcut keys list and click the Modify button at the upper right.
Click OK to accept the change. Now the chosen shortcut keys will execute the function chosen in step 3 above whenever they are pressed.
|
Note |
All existing shortcut keys for the currently selected Function are listed in the Keys selection box. If the Keys list is empty, it indicates that the chosen key combination is free for use. If it were not, and you wanted to reassign a shortcut key combination that is already in use, you must first delete the existing key. Shortcut keys that are greyed-out in the listing on the Customize dialog, such as F1 and F10, are not available for reassignment. |
Example: Assigning styles to shortcut keys
You can configure shortcut keys to quickly assign styles in your document. Some shortcuts are predefined, such as Ctrl+0 for the Text body paragraph style, Ctrl+1 for the Heading 1 style, and Ctrl+2 for Heading 2. You can modify these shortcuts and create your own.
Click Tools → Customize → Keyboard. The Keyboard page of the Customize dialog (Figure 8) opens.
To have the shortcut key assignment available only with one component (for example, Writer), select that component’s name in the upper right corner of the page; otherwise select LibreOffice button to make it available to every component.
Choose the shortcut keys you want to assign a style to. In this example, we have chosen Ctrl+9.
In the Functions section at the bottom of the dialog, scroll down in the Category list to Styles. Click the expansion symbol (usually a + sign or triangle) to expand the list of styles.

Choose the category of style. (This example uses a paragraph style, but you can also choose character styles and others.) The Function list will display the names of the available styles for the selected category. The example shows some of LibreOffice’s predefined styles.
To assign Ctrl+9 to be the shortcut key combination for the List 1 style, select List 1 in the Function list, and then click Modify. Ctrl+9 now appears in the Keys list on the right, and List 1 appears next to Ctrl+9 in the Shortcut keys box at the top.
Make any other required changes, and then click OK to save these settings and close the dialog.
Changes to the shortcut key assignments can be saved in a keyboard configuration file for use at a later time, thus permitting you to create and apply different configurations as the need arises. To save keyboard shortcuts to a file:
After making your keyboard shortcut assignments, click the Save button at the right of the Customize dialog (Figure 8).
In the Save Keyboard Configuration dialog, select All files from the Save as Type list.
Next enter a name for the keyboard configuration file in the File name box, or select an existing file from the list. If you need to, browse to find a file from another location.
Click Save. A confirmation dialog appears if you are about to overwrite an existing file, otherwise there will be no feedback and the file will be saved.
Loading a saved keyboard configuration
To load a saved keyboard configuration file and replace your existing configuration, click the Load button at the right of the Customize dialog, and then select the configuration file from the Load Keyboard Configuration dialog.
To reset all of the keyboard shortcuts to their default values, click the Reset button near the bottom right of the Customize dialog. Use this feature with care as no confirmation dialog will be displayed; the defaults will be set without any further notice or user input.
In LibreOffice, when something happens, we say that an event occured. For example, a document was opened, a key was pressed, or the mouse moved. You can associate a macro with an event, so the macro is run when the event occurs. A common use is to assign the “open document” event to run a macro that performs certain setup tasks for the document.
To associate a macro with an event, use the Events page of the Customize dialog. For more information, see Chapter 13, Getting Started with Macros.
Adding functionality with extensions
An extension is a package that can be installed into LibreOffice to add new functionality.
The official extension repository is located at http://extensions.libreoffice.org/. These extensions are free of charge.
To install an extension, follow these steps:
Download an extension and save it anywhere on your computer.
In LibreOffice, select Tools → Extension Manager from the menu bar. In the Extension Manager dialog (Figure 9), click Add.
A file browser window opens. Find and select the extension you want to install and click Open. The extension begins installing. You may be asked to accept a license agreement.
When the installation is complete, the extension is listed in the Extension Manager dialog.
|
Tip |
To download extensions that are listed in the repository, open the Extension Manager and click the Get more extensions online... link. |
|
Note |
To install a shared extension, you will need write access to the LibreOffice installation directory. |
This section describes a few of the more popular extensions to LibreOffice. Some are installed by default. If the extension is not already installed on your system, see Installing extensions in the previous section for step-by-step instructions. All tools listed here are open source and free of charge.
Enables you to make minor modifications to the text of existing PDF files when the original source files do not exist or you are unable to open the source files. (Whenever possible, modify the source and regenerate the PDF to obtain the best results.)
When the extension is installed, PDF is listed as a choice in the File Type drop-down list in the File → Open dialog.
Best results can be achieved with the PDF/ODF hybrid file format, which this extension also enables. A hybrid PDF/ODF file is a PDF file that contains an embedded ODF source file. Hybrid PDF/ODF files will be opened in LibreOffice as an ODF file without any layout changes.
Non-hybrid PDF documents open in Draw. Depending on the complexity of the layout, changes may be easy or difficult to make, and the saved result may or may not preserve the original layout. Font substitution may occur.
Documents with more sophisticated layouts, such as those created with professional desktop publishing applications that use special fonts and complex vector graphics, are not suitable for the PDF Import Extension. Similarly, importing large documents may cause performance issues.
Provides extra control over Impress presentations; for example, the presenter has ability to see the upcoming slide, the slide notes, and a presentation timer—while the audience sees only the current slide. The Presenter Console displays the elements in three easily changeable views:
The first view displays the current slide, including the effects, and the upcoming slide.
The second view shows the speaker's notes in large, clear, and scalable type, plus the current and upcoming slide.
The third view is a slide sorter view with the slide thumbnails.
|
Note |
The Presenter Console works only on operating systems that support multiple displays. |
Creates professional database reports from Base. You can define group and page headers, group and page footers, and calculation fields. Export your reports to PDF or OpenDocument formats, or send them as email attachments.
Provides more than 120 templates for Writer, Calc, and Impress. Available in several languages. After you have installed this extension, you will find the templates under File → New → Templates and Documents.
Adds two new items to the File → Templates menu in Writer that allow you to assign a new template to the current document or to a folder of documents. All styles and formatting will be loaded from that template and the document will behave as it was created using that template.
Solver for Nonlinear Programming (for Calc)
Calc ships with a solver engine for linear programming only. This extension adds more solvers, which are capable of handling nonlinear problems as well as linear ones:
DEPS - Differential Evolution & Particle Swarm Optimization
SCO - Social Cognitive Optimization
DataPilot Tools for Calc
Adds some utility functions that make using the Calc DataPilot easier:
Display the current source range for a DataPilot
Change the source range for a DataPilot
Refresh all DataPilots on the current sheet