Using your camera - ISO settings
Using your camera - ISO Settings
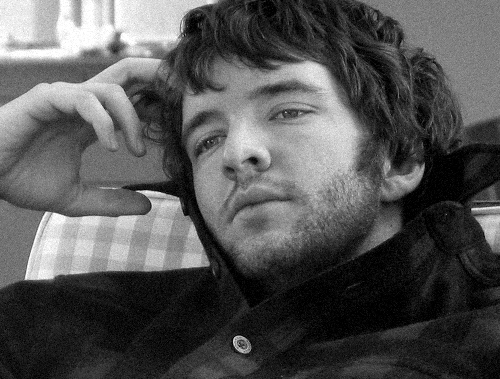
| What are ISO settings? In film cameras, different film types were more or less sensitive to light. Films were rated based on this sensitivity. Films with larger silver crystals reacting to light had higher ISO ratings than films with smaller silver crystals. High ISO films had a grainy appearance due to the larger silver crystals. The "grainy look" is popular in B&W photography. This photo from Brian Auer's Flickr photostream is a good example. It was shot with an ISO setting of 3200. See more grainy photos in the Ilford Delta 3299 Film group on Flickr. High ISO settings and the resulting grainy look work well for low-light and street photography at night or inside where there is not much light. Using high ISO settings lets you use faster shutter speeds which help anywhere lighting is limited. Remember, grainy is different from blurry. Blur comes from a shaky camera or using a too-slow shutter speed. |
|
Let's look at three photos of the same subject taken at ISO 800, 1600 and 3200. Can you tell which is which? Hold your mouse over each photo to see the ISO setting.   If you're taking photographs that will be scaled down and published on the web, the high-grain that comes with high ISO settings may not be visible. If you plan on creating prints or publishing full-size images, then the grain may detract from the image quality. Look at the enlarged sections of the same photos below. 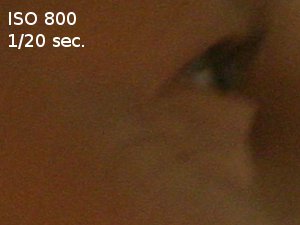 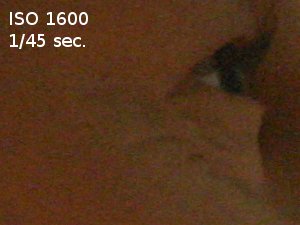 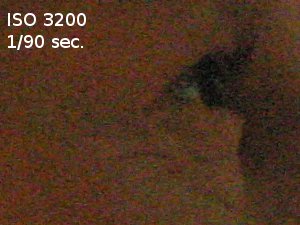 In the examples above, the ISO 3200 setting produced lots of grain. In the digital camera world we call this NOISE. Notice that as the ISO speeds doubled with each shot, the shutter stayed open half as long to let in the same amount of light. It's difficult to use shutter speeds below 1/60 second when holding a camera by hand and still have sharp photographs. The blur you see in the ISO 800 photo is from camera shake from the 1/20 second shutter speed. |
|
What ISO setting should I use? Slower ISO speeds will produce images that are free from noise. Higher ISO settings produce more noise. Unless you want to induce noise in your photo, use the lowest ISO speed that will still give you enough light and allow for a fast shutter speed to avoid camera shake. This is what the AUTO ISO setting on your camera will do. If you're shooting sports scenes, you'll need to increase your ISO settings to 400, 800 or higher. This will make your camera more light senstive and you can use faster shutter speeds. On most cameras you'll need to switch out of AUTO mode and use the P (Program) mode or other manual modes before you can change the ISO setting. |
|
| How to add noise to your photos: If you want to add noise to a photo it's easy with photo editing software. Before noise: After adding noise:
|
|
Last modified: Thursday, 24 July 2014, 2:54 PM
